Old Software: How to Use Legacy Programs Safely (2025 Guide)
Practical guidance for running legacy applications with minimal risk
Came from a Retired Page?
Start here if you were redirected from an older section
We’ve consolidated our older “old software” guides into this modernised page. The content you’re after now lives in these sections:
- Safety & Isolation → see How to run old software and Cybersecurity.
- Checksums & Signatures → see Verify downloads and Resources.
- Compatibility → see Compatibility tips and Troubleshooting.
- Legal & FAQs → see Legal considerations and FAQs.
Microsoft / Internet Explorer — Archived Articles
Historical interest only. Use modern, supported browsers and tools where possible.
| Category | Article | Status |
|---|---|---|
| Windows XP — Install & Maintenance | How To Install XP — Part One | retired |
| Windows XP — Install & Maintenance | Windows XP Clean Install — Part Two | retired |
| Windows XP — Install & Maintenance | New Installation of Windows XP — Part Three | retired |
| Windows XP — Install & Maintenance | Clean Install XP — Part Four | retired |
| Windows XP — Install & Maintenance | Microsoft Windows XP Updates — What? Why? How? | retired |
| Windows XP — Install & Maintenance | Microsoft XP Updates — Applying Updates | retired |
| Windows XP — Install & Maintenance | Do Not Download Windows XP SP2 | retired |
| Windows XP — Install & Maintenance | Windows XP SP3 Download | retired |
| Windows XP — Install & Maintenance | System Restore, Windows XP | retired |
| Windows XP — Install & Maintenance | Windows XP Recovery Console | retired |
| Internet Explorer 8/9 — Feature & Fix Guides | Internet Explorer 8 (features) | retired |
| Internet Explorer 8/9 — Feature & Fix Guides | Internet Explorer Software (more features) | retired |
| Internet Explorer 8/9 — Feature & Fix Guides | Internet Explorer Updates | retired |
| Internet Explorer 8/9 — Feature & Fix Guides | Internet Explorer Slow — Quick Wins | retired |
| Internet Explorer 8/9 — Feature & Fix Guides | Internet Explorer Running Slow — More Fixes | retired |
| Internet Explorer 8/9 — Feature & Fix Guides | Reinstall Internet Explorer | retired |
| Internet Explorer 8/9 — Feature & Fix Guides | Internet Explorer 9 — Overview | retired |
Security Tools — Archived Articles
These pieces reflect older versions of tools. For current protection, use supported modern solutions.
| Category | Article | Status |
|---|---|---|
| Antivirus & On-Demand Scanners | Free Virus Removal Software — Round-up | retired |
| Antivirus & On-Demand Scanners | Free Computer Virus Scan — Vendor Tools | retired |
| Antivirus & On-Demand Scanners | Norton Anti Virus Protection | retired |
| Malwarebytes Classic How-tos | Malwarebytes — Download & Install | retired |
| Malwarebytes Classic How-tos | Malwarebytes Anti-Malware — Using It | retired |
| Microsoft Tools | Microsoft Malicious Software Removal Tool (MRT) | retired |
| Microsoft Tools | Microsoft Security Essentials — Part 1, Part 2, Part 3 | retired |
| McAfee — Utilities & Support | McAfee Free Virus Scan | retired |
| McAfee — Utilities & Support | McAfee Computer Virus Remover (Stinger, GetSusp) | retired |
| McAfee — Utilities & Support | McAfee Removal Tool | retired |
| McAfee — Utilities & Support | McAfee Customer Service — Tools & Tips | retired |
Old software might sound obsolete, but for many, it’s essential. Whether you’re supporting legacy systems in a business, revisiting nostalgic programs, or accessing unique features that modern tools removed, “old software” still has a place today.
This page explains what counts as old/legacy software, where to find it legally and safely, and practical ways to run it on current PCs and Macs, all without putting your data at risk.
There are valid reasons people still rely on older apps. The aim isn’t just nostalgia. It is to get a specific job done safely and predictably.
- Compatibility: Only that program opens a legacy file format or workflow correctly.
- Licensing value: A perpetual licence still meets a narrow, well-defined need.
- Cost savings: Avoid expensive upgrades or subscriptions.
- Hardware ties: The software drives specialist kit (lab, industrial, older interfaces).
- Offline tasks: Work is performed on an air-gapped PC by design.
- Preservation: Accessing historic data, media, or research archives.
- Missing features: New versions sometimes remove what you rely on.
- Nostalgia: Classic games/tools still feel great to use.
But be realistic about risk: no security updates, fragile drivers, and untrusted installers are common. If you must use legacy apps, run them safely (VM/Sandbox, offline) and verify downloads before execution.
Bottom line: use modern equivalents when possible; otherwise isolate, restrict network access, and validate files.
Join The Human Byte — Get The Ultimate BIOS Update Guide
- Receive the Ultimate BIOS Update Pack
- Includes a set of checklists, flowcharts, and your Beep Code Finder support your BIOS update process
- Also includes a full set of eBooks including a Survival Guide and step-by-step Support Guide
- Receive regular emails with practical information you can use
- I only use your e-mail for the newsletter. Unsubscribe anytime.

What Counts as Legacy Software?
Old software (or legacy software, aka vintage/unsupported/EOL apps) is software that is no longer updated or officially supported by its creator. It includes:
- DOS-era tools and games, Windows 3.x/9x/ME apps, classic macOS titles.
- 16-bit installers that won’t run on 64-bit Windows.
- Software whose vendor stopped updates (no security fixes).
- Discontinued apps (e.g., plugins like Adobe Flash).
- Legacy business applications, still required by older workflows.
- “Abandonware” (software no longer sold or maintained).
- Retro games and creative tools from the 90s/2000s.
Key insight: Old doesn’t mean useless. Some legacy apps remain mission-critical or uniquely capable.
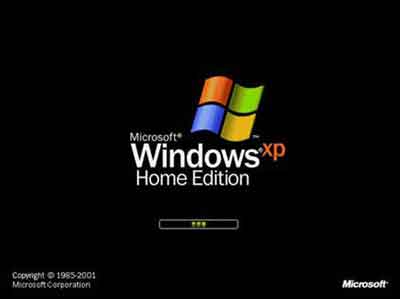 Old Software | Microsoft Windows XP Home Edition Splash Screen (Released October 2001)
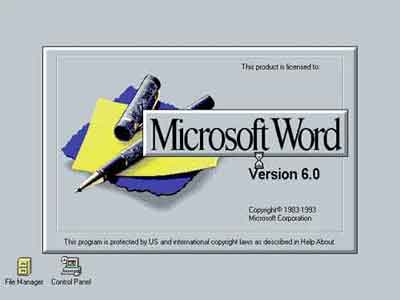 Old Software | Microsoft Word v6.0 Splash Screen (Released 1993)
How to Run Old Software Safely on Modern Systems
Choose a Method
Pick the safest, simplest way to run older software. Most users should start with a virtual machine.
| Need | Best Option | Why | Key Steps |
|---|---|---|---|
| One-off, quick safety test | Windows Sandbox Win 10/11 Pro • Enterprise Disposable, auto-resetting Windows VM | Clean, disposable environment | Enable feature → Launch → Test → Close to discard |
| Repeatable use of legacy Windows app | Virtual Machine — VirtualBox / VMware Workstation Player / Parallels Desktop Snapshots, isolation, offline by default | Persistent, snapshot-friendly, safe | Create VM → Install guest OS → Snapshot → Install app |
| DOS or old Windows (3.x/9x) | DOSBox / DOSBox-X / 86Box Accurate emulation of period hardware | Great compatibility for old titles | Install emulator → Mount media → Configure |
| CLI tools on Linux/macOS | Container — Docker / Podman Isolated user space, reproducible builds | Clean, repeatable environments | Pull image → Bind a folder → Run |
| Windows app on Linux/macOS | Wine Or CrossOver • Proton | Runs some Windows apps without a VM | Install Wine → Create prefix → Test |
| Maximum isolation or legacy hardware/peripherals | Air-Gapped Machine No Network Old laptop/PC kept offline purely for legacy apps | Highest isolation, original drivers, real ports | Repurpose old PC → Clean install → Disable Wi-Fi/LAN → Transfer via USB that you scan on a modern system first |
Why Cybersecurity Matters with Old Software — Risks You Should Know!
Key Risks (Why Isolation Matters)
- Malware: Old installers and “abandonware” mirrors are frequent malware carriers.
- Exploits: Out-of-support apps lack security fixes; any network connection increases exposure.
- Unpatched vulnerabilities: Known CVEs remain open indefinitely in legacy software.
- Drivers: Unsigned/legacy drivers can destabilise or break your host OS.
- Data loss: No modern backup/encryption; corruption goes unnoticed until too late.
- Incompatibility: Old apps may misbehave on modern hardware/OS combinations.
- Bugs with no vendor fix: Functional issues persist with no upstream support.
How to Mitigate
- Prefer running legacy apps offline in a VM; deny internet by default.
- Apply firewall rules to block the app or the entire VM from the network.
- Take snapshots before changes; revert instantly if something breaks.
- Verify downloads (checksums/signatures) and scan with up-to-date AV/EDR.
- Keep versioned backups of data and VM images.
- Use limited user accounts in the VM; avoid admin unless required.
- When using removable media, scan USB drives on a modern system first before importing into the VM.
Practical default: Offline VM + snapshots + verified installers covers most risk. Only enable networking temporarily and on a strict allow-list if absolutely necessary.
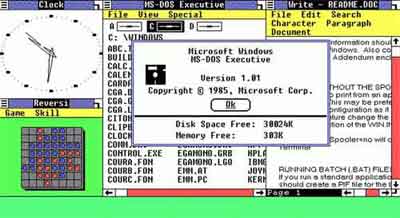 Old Software | Microsoft Windows version 1.0 (Released 20 November 1985)
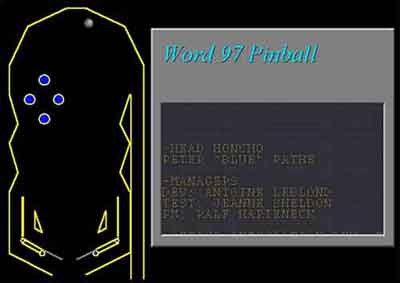 Old Software | Microsoft Word 97 Hidden Easter Egg Pinball Game (Released 2002)
Microsoft formally stopped including Easter Eggs in its programs as part of its Trustworthy Computing Initiative in 2002
Run in a Virtual Machine (Step-by-Step)
1) Create the VM
- Choose a hypervisor: VirtualBox (free), VMware Workstation Player (free for personal), Parallels (macOS), UTM (Apple Silicon).
- Create a new VM with your legacy OS (e.g., Windows XP). Allocate modest CPU/RAM. Use a dynamic virtual disk.
- Before first boot: set Clipboard and Drag-and-Drop to Disabled; turn Shared Folders Off.
2) Make it Offline by Default
- Disable the virtual NIC (Adapter Off) or use Host-only networking.
- Inside the guest, block outbound connections with its firewall.
3) Harden the Guest
- Create a non-admin user and use that for daily runs.
- Enable snapshots and take one before installs.
- Create a Quarantine folder for file exchange. Scan files there first.
4) Install & Use
- Verify the installer (see Verify Downloads).
- Snapshot → Install → Test.
- If it misbehaves, revert snapshot and try again with different settings.
Windows Sandbox & Containers
Windows Sandbox (Quick, Disposable)
- Requirements: Windows 10/11 Pro, Enterprise, or Education with virtualisation enabled in BIOS/UEFI.
- Enable: Control Panel → Turn Windows features on or off → tick Windows Sandbox → Restart.
- Use: Launch “Windows Sandbox” → drag file in → test → close window to discard all changes.
Note: Sandbox is for short tests, not long-term setups. No snapshots; state is not saved.
Containers (Linux/macOS/WSL)
For command-line tools, a container gives isolation without a full VM:
Copy & Run: Quarantine Container
Creates a disposable shell with ./quarantine mounted at /work. Replace <image> with something like alpine:latest or debian:stable-slim.
docker run --rm -it -v "$PWD/quarantine:/work" <image> /bin/shmkdir -p quarantine. On Windows PowerShell, use $PWD the same way; if you hit path issues, substitute the absolute path.
Verify Downloads (Hashes & Signatures)
Do both where possible: compare a published SHA-256 hash and check the publisher’s digital signature (or PGP signature).
Copy & Run: Verify Old Downloads on Windows (PowerShell)
Hash (PowerShell)
Compute a SHA-256 hash with Windows PowerShell (v5+ or PowerShell 7).
Get-FileHash "C:\Path\file.exe" -Algorithm SHA256Hash (certutil)
Use the built-in certutil tool (works in Command Prompt or PowerShell).
certutil -hashfile "C:\Path\file.exe" SHA256Check Authenticode Signature
Verify the publisher’s digital signature (PowerShell).
Get-AuthenticodeSignature "C:\Path\file.exe" | Format-ListStatus : Valid and the expected SignerCertificate subject.
Copy & Run: Verify Old Downloads on macOS
Hash
Compute a SHA-256 checksum in Terminal.
shasum -a 256 /path/to/file.dmgGatekeeper assessment (allow/deny)
Ask Gatekeeper if an app would be allowed to run.
spctl --assess --type execute /path/to/App.appInspect code signature
Show signer, entitlements, and team info (first 20 lines).
codesign -dv --verbose=4 /path/to/App.app 2>&1 | head -n 20accepted for trusted apps.
The codesign output should list the expected Authority chain and TeamIdentifier.
Copy & Run: Verify Old Downloads on Linux
Hash
Compute a SHA-256 checksum in your shell.
sha256sum /path/to/file.AppImagePGP: Import publisher key
Fetch the public key by its key ID (verify fingerprint on the vendor’s site).
gpg --keyserver keys.openpgp.org --recv-keys <KEYID>PGP: Verify signature
Check a detached signature (.asc/.sig) against the file.
gpg --verify file.sig filehkps://keys.openpgp.org with --keyserver hkps://keys.openpgp.org).
Tip: Mismatched hash or an Unknown/Invalid signature? Do not run it. Locate a trustworthy source.
Networking & Least Privilege
- Offline by default: Disable the VM’s adapter or set Host-only. Temporarily enable NAT only if required, then disable again.
- Separate account: Use a guest, non-admin account for daily work.
- No integrations: Clipboard/drag-and-drop/shared folders off. If you must share files, use a single Quarantine folder and scan first.
- Snapshots: Take one before installs; revert after testing to remove changes.
- Use Compatibility Administrator (shims) for stubborn Windows apps.
- For games, check community patches/wrappers (e.g., Direct Draw → OpenGL).
- Pause auto-updates for the legacy app/VM to prevent breakage.
Pro tip: Snapshot your VM before changes. If something breaks, revert in seconds.
Compatibility Fixes
- Run as: In Windows, set Compatibility mode (e.g., Windows XP), 256 colours, 640×480, or disable DPI scaling.
- Missing DLLs: Install period runtime packs (e.g., VC++ redistributable) inside the VM, not on the host.
- 16-bit installers: Run them in a 32-bit Windows VM or extract with tools that can unpack legacy installers.
- Old media: Mount ISOs/IMGs in the VM; avoid direct hardware passthrough unless necessary.
Common Problems and How to Solve Them
| Problem | Quick Fix |
|---|---|
| Installer won’t launch | Try a 32-bit guest OS; install required dependencies (e.g., VC++ runtimes/.NET/DirectX); run as Administrator inside the guest only. |
| Program won’t install | Use Windows Compatibility Mode (XP/7) or install inside a VM that matches the original OS. |
| Missing/errored DLLs | Reinstall original dependencies; prefer official vendor packages. Avoid random DLL sites where possible. |
| Graphical glitches | Switch to software rendering; try community wrappers (e.g., dgVoodoo2 for old DirectX); use the VM’s video drivers/guest tools. |
| Crashes on start/launch | Set an older compatibility mode or use a shim; reduce colour depth/resolution (e.g., 16-bit, 800×600); run as Admin (guest only); disable overlays; on Mac/Linux try Wine/CrossOver. |
| No sound / no 3D | Install Guest Additions/VMware Tools/Parallels Tools; enable basic audio in VM settings; prefer software rendering; avoid GPU passthrough for legacy titles. |
| No internet support | Run offline by design; emulate older protocols if required; use host-only or NAT networking in a VM. |
| Won’t exit full screen | Use the hypervisor’s host key (e.g., Right Ctrl in VirtualBox; Ctrl+Alt in VMware; Control+Option in Parallels) to release, then toggle View/Full Screen. |
Legal Considerations: When Is It OK to Use or Share Old Software?
- You own a valid licence: Generally fine to keep using the software you’re licensed for.
- Abandonware: Popular, but legally gray unless the right's holder permits it.
- Pirated copies: Illegal and often unsafe—avoid.
- Buying used: Some licences allow resale; others restrict transfer. Check the EULA.
This is general information, not legal advice. Licensing rules vary by product and country—always review the EULA and local laws.
Old Software — FAQs
Is it safe to run old software?
Where can I get legitimate old installers?
How do I verify an old download?
What’s best for XP-era apps?
Is it legal to use old software?
Can malware escape a VM?
Is Windows Sandbox “safe enough”?
Can I run 16-bit software on Windows 11?
Resources: Download Sites, Tools, Forums & More
| Type | Trusted Examples |
|---|---|
| Download | OldVersion.com, OlderGeeks, MyAbandonware |
| Tools | VirtualBox, DOSBox, DOSBox-X, Wine, CrossOver |
| Compatibility | Microsoft Compatibility Administrator |
| Forums | VOGONS, WinWorldPC, My Digital Life |
| Licensing Help | Electronic Frontier Foundation (EFF), Free Software Foundation (FSF) |
Safety first: Avoid shady download mirrors. Always verify checksums (if provided) and scan with reputable antivirus before running.
Final Thoughts: Preserve the Past, Stay Safe Today
Old software continues to deliver practical value, unique features, and nostalgic joy. With the right tools and a security-first setup (ideally inside a VM), you can preserve and enjoy these digital treasures in 2025 and beyond.
Key Takeaway: When managed safely and responsibly, old software can still be an asset—not a liability.